

One of the things I enjoy most about astrophotography is the opportunity to capture objects that are otherwise invisible to the eye. It has always been amazing to me that I can point a telescope toward a seemingly empty patch of sky and collect photons that have traveled for millennia across space, revealing structures that we could never see on our own. Sometimes the results are surprising. Often times, they are breathtaking!
The constellation of Cygnus, the Swan, is one of my favorite regions of the summer sky to observe. During this time Cygnus flies high overhead, through the rich star fields of the Milky Way. It is home to an incredible collection of nebulae, star clusters, and other deep-sky objects. Among these is one of the most fascinating targets for astrophotographers: The Cygnus Loop, better known to many as the Veil Nebula.
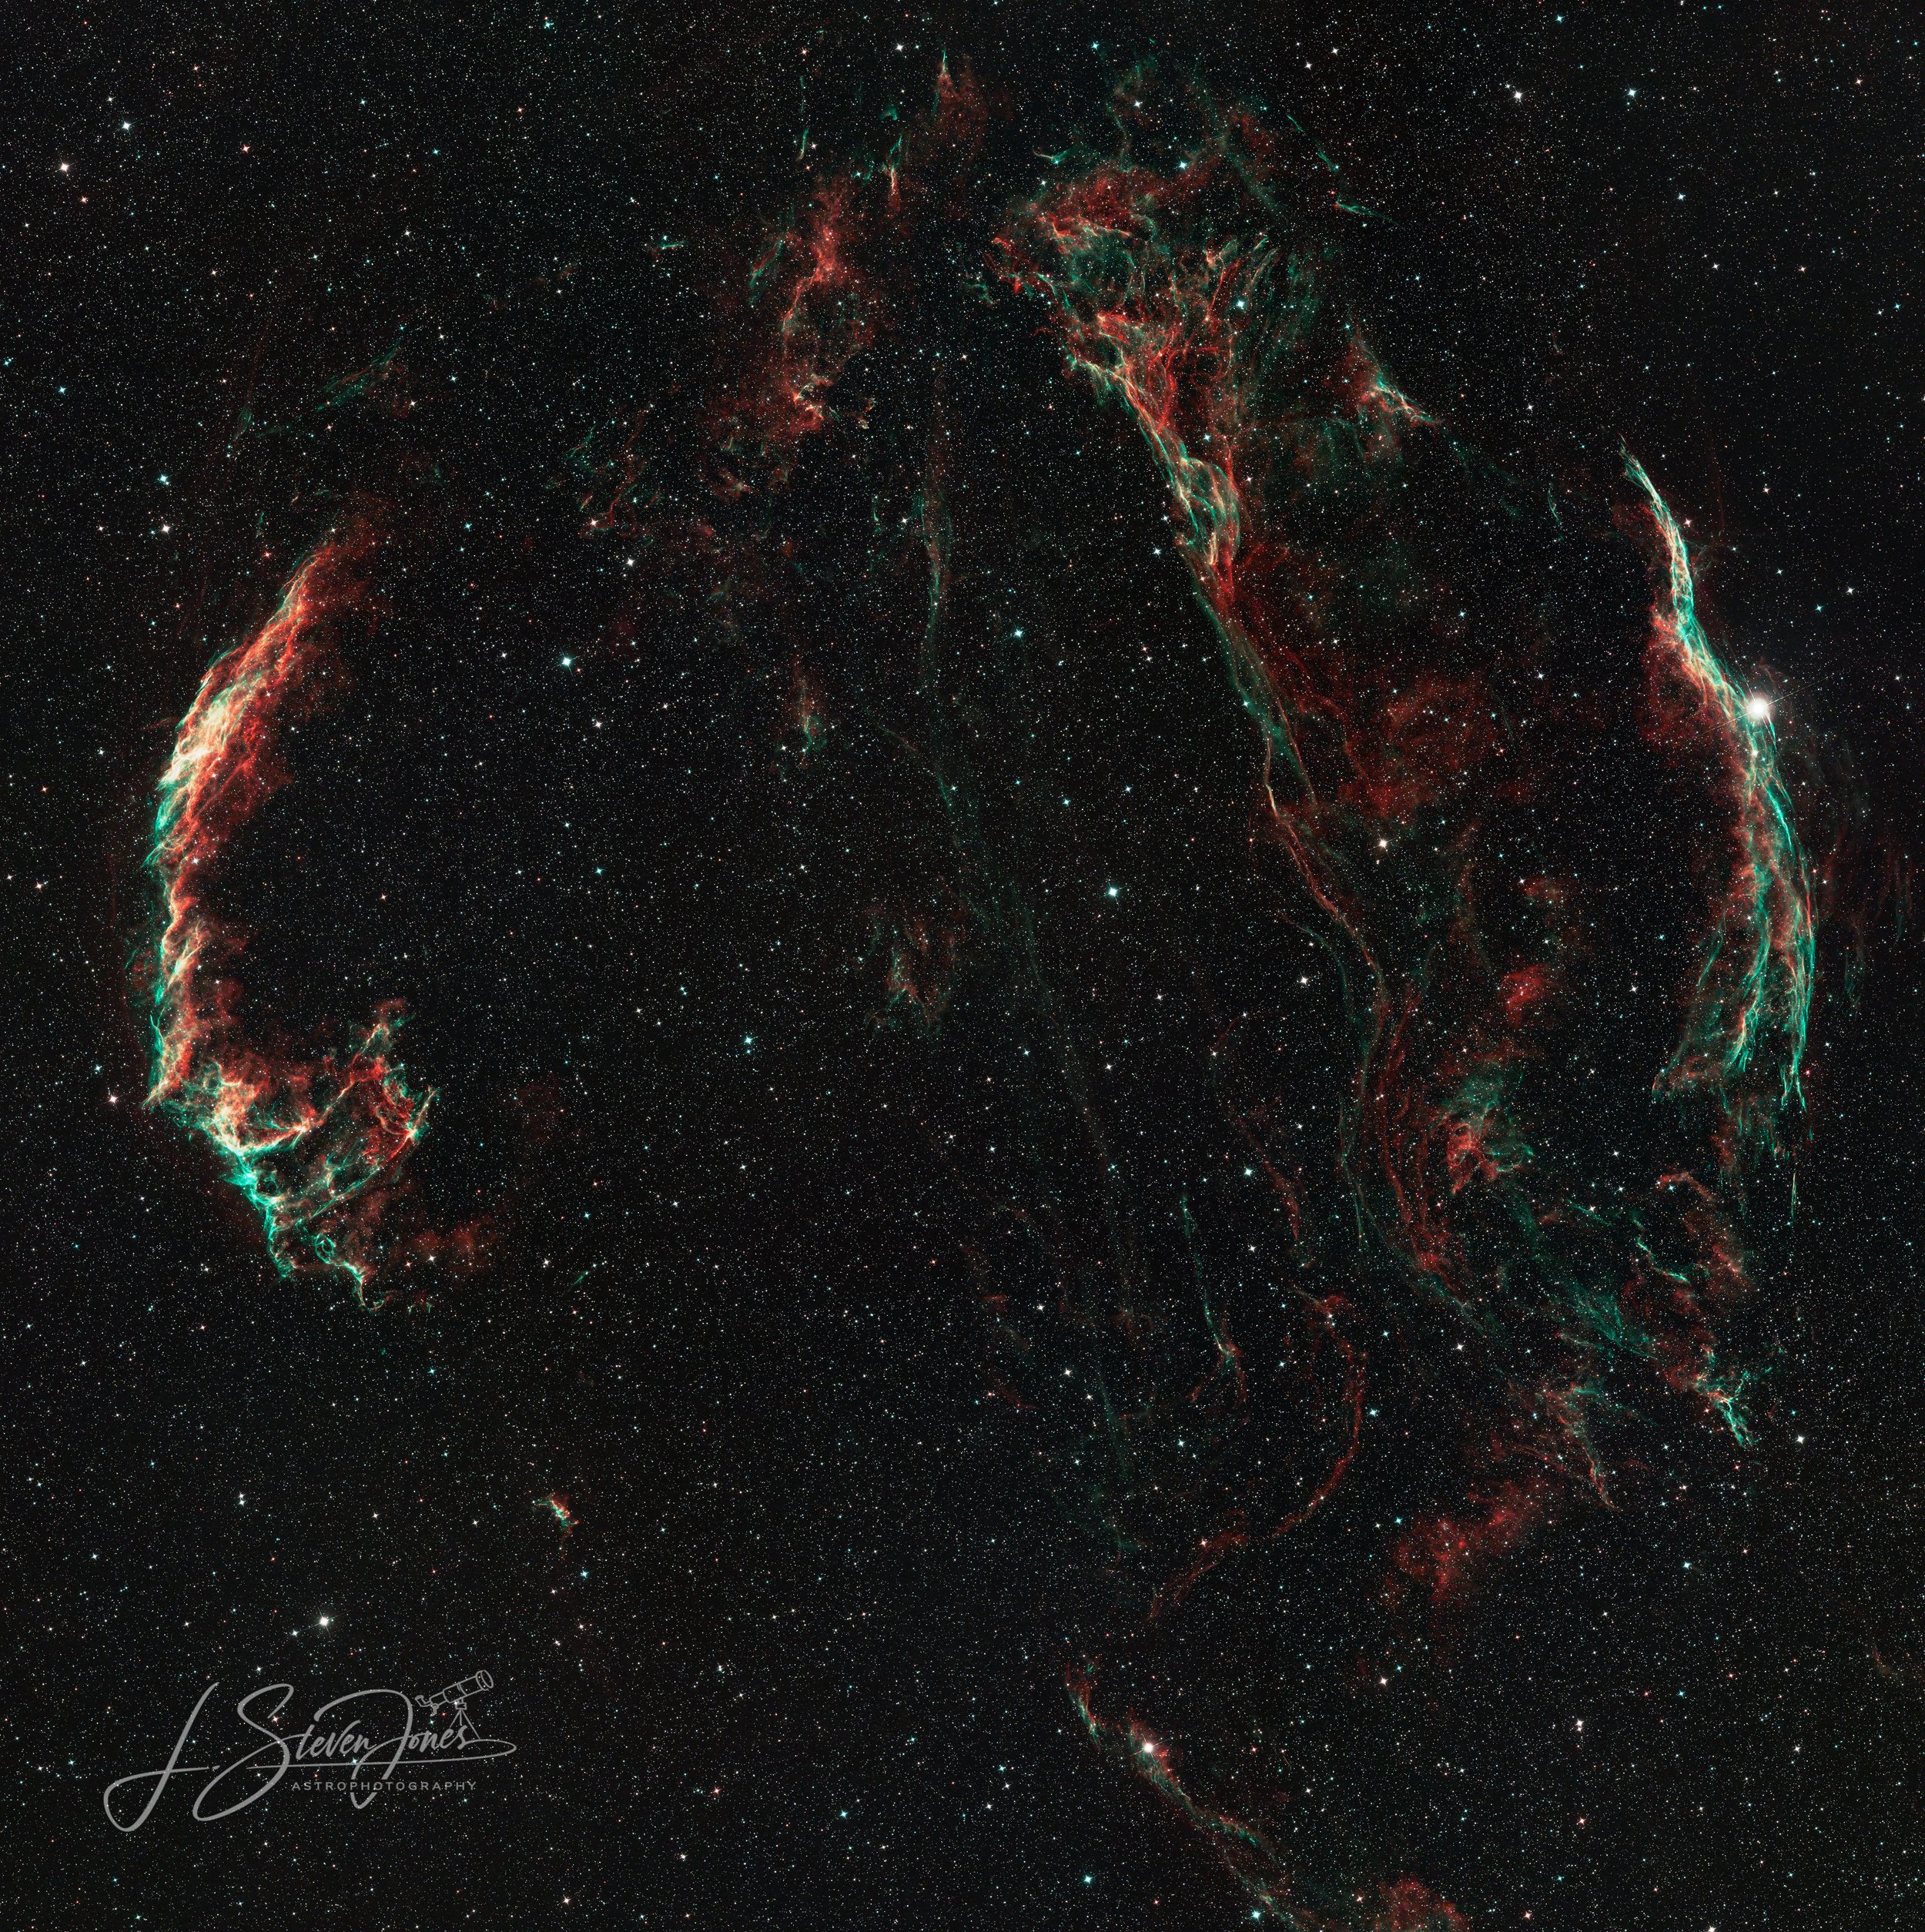
I’ve photographed many nebulae over the years, but the Veil presents an interesting challenge. It’s delicate, wispy structures cover a large area of the sky, approximately the same size as six full Moons in diameter. This makes it difficult to image the entire object in a single image. I had imaged individual parts of the Veil, but for this project I wanted to attempt to get the entire Loop. This meant that what I learned in imaging The Heart of Cygnus about mosaics was going to be put to test.
The Cygnus Loop: The Remains of a Dying Star
Approximately 10,000 to 20,000 years ago a massive star 2400 light-years from Earth reached the end of its life. Having exhausted the nuclear fuel that supported it against gravity, the star’s core collapsed, triggering an explosion known as a supernova.
For a brief time this single star may have shone with the light of billions of suns, releasing a tremendous amount of energy and throwing its outer material into the surrounding space. The results of this explosion are what we see today.
As the shock wave from this explosion spreads, it moves through the surrounding interstellar gas and dust, heating and exciting the material until it glows, emitting light at particular wavelengths. This is what produces the intricate ribbons and filaments that we see in the Cygnus Loop.
Unlike many nebulas which are regions of dust and gas where new stars are being formed, the Cygnus Loop is showing us the aftermath of the violent death of a star. This slowly expanding shell of material offers astronomers an opportunity to study the effects of a supernova on the surrounding interstellar environment.
The Eastern & Western Veils
Although this object is a single enormous supernova remnant, the brightest regions have been given various names. The two most prominent are the Eastern & Western Veil Nebulae.
The Western Veil Nebula (NGC 6960) forms a sweeping arc of delicate filaments along the western edge of the Cygnus Loop. These intricate strands of gas resemble colorful threads of silk drifting through space. The colors seen in full-color images are results of the types of gas being heated: Blue is oxygen, yellow is sulfur, and red is hydrogen. Many people see a smiling face in this object, with others seeing a xenomorph from the movie “Alien.”
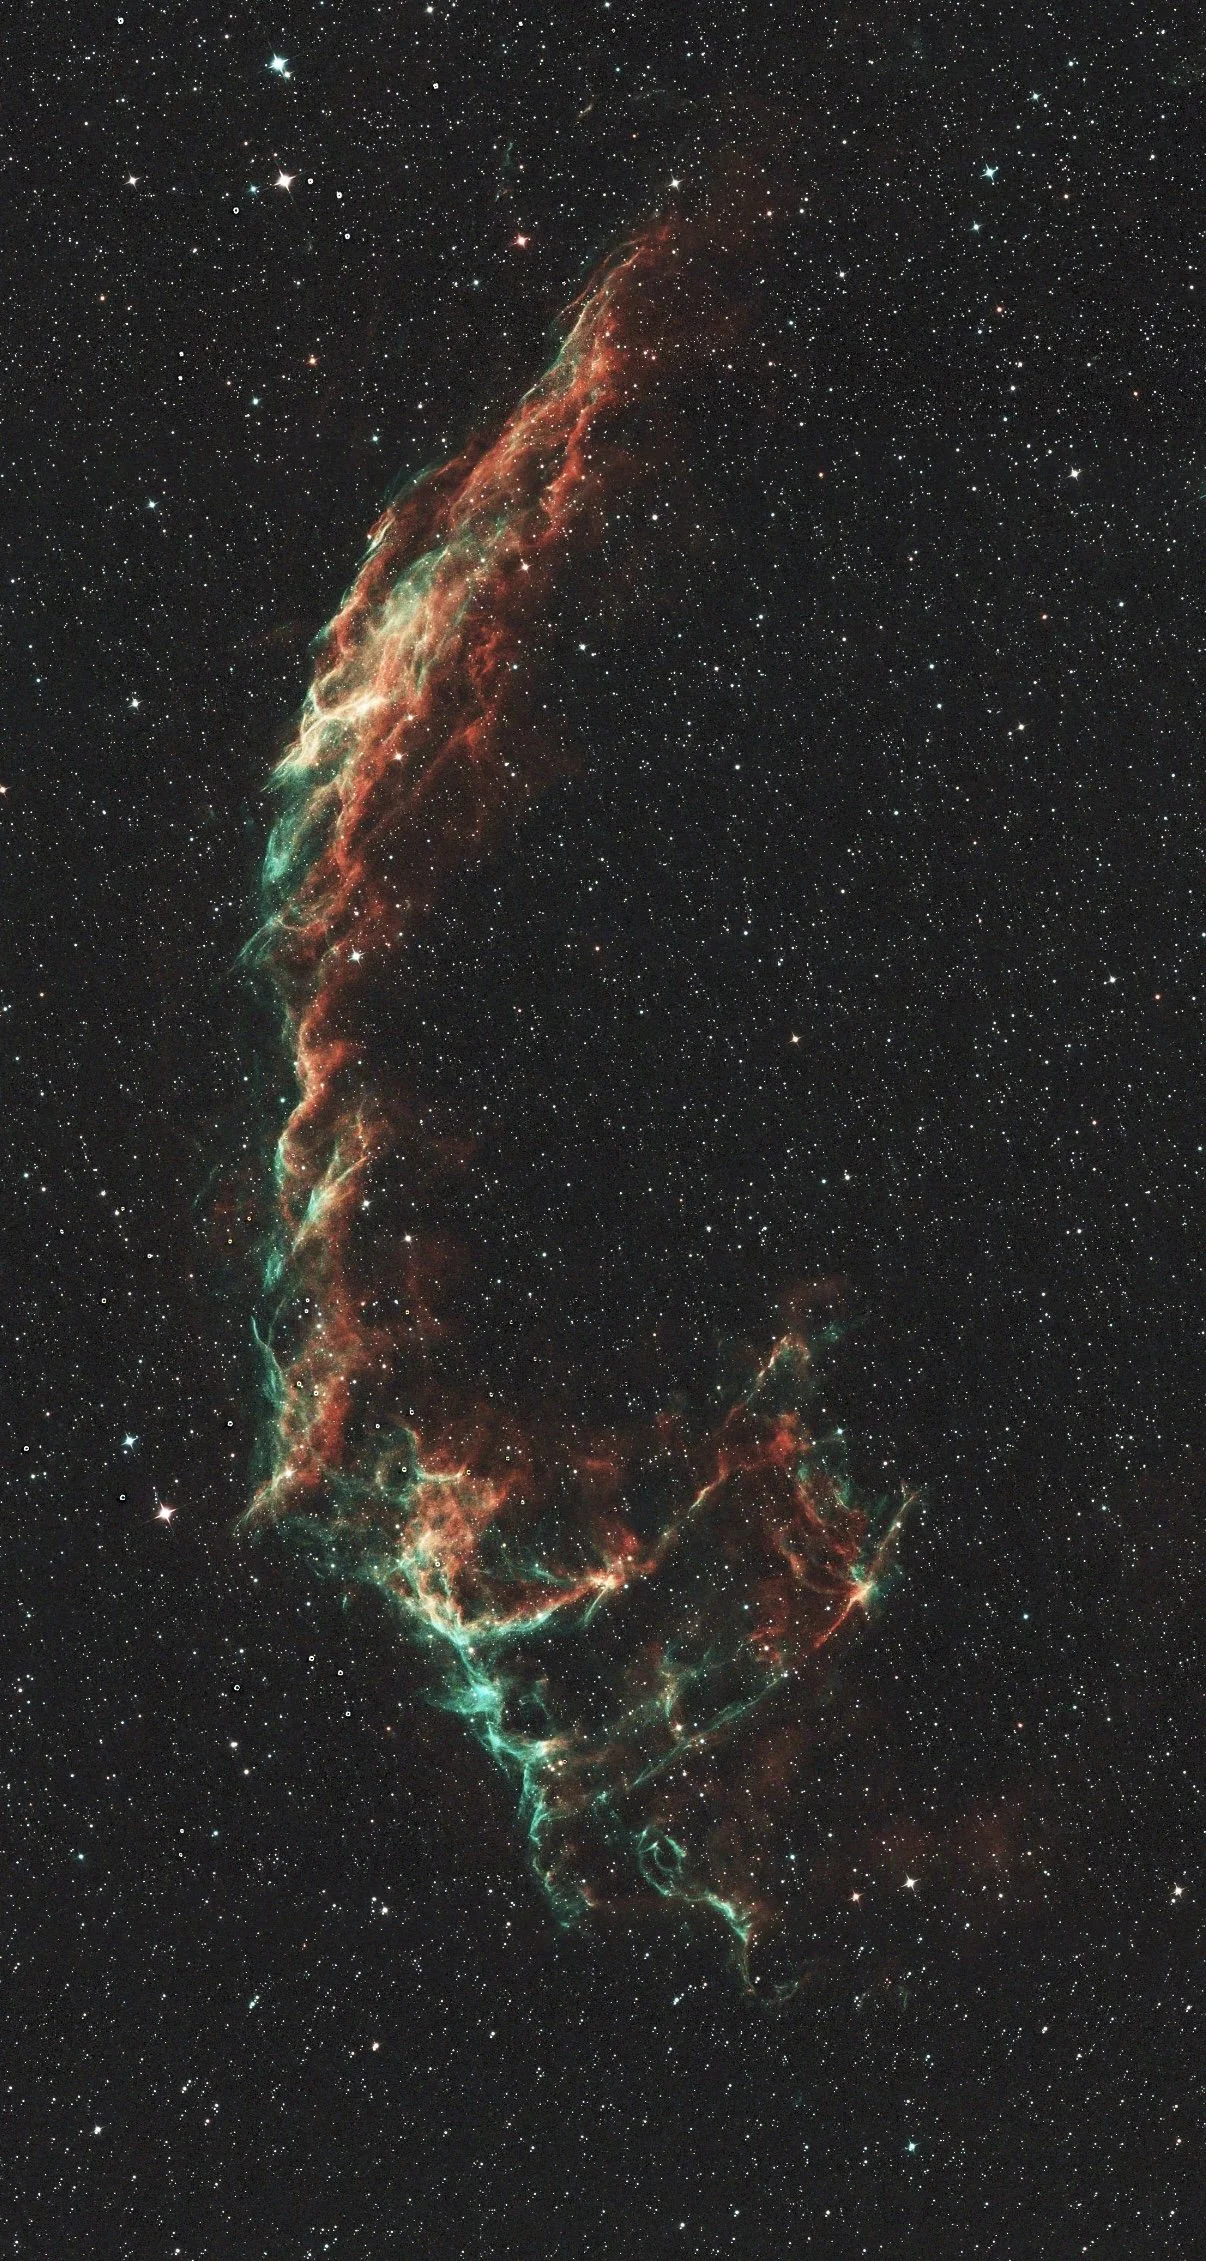
Eastern Veil Nebula
The Western Veil Nebula (NGC 6992), sometimes referred to as “The Witches Broom,” stretches outward from the bright star 52 Cygni. This gives it a distinctive broom-like appearance. Interestingly 52 Cygni is not part of the supernova remnant, it simply happens to lie along the same line of sight from Earth.
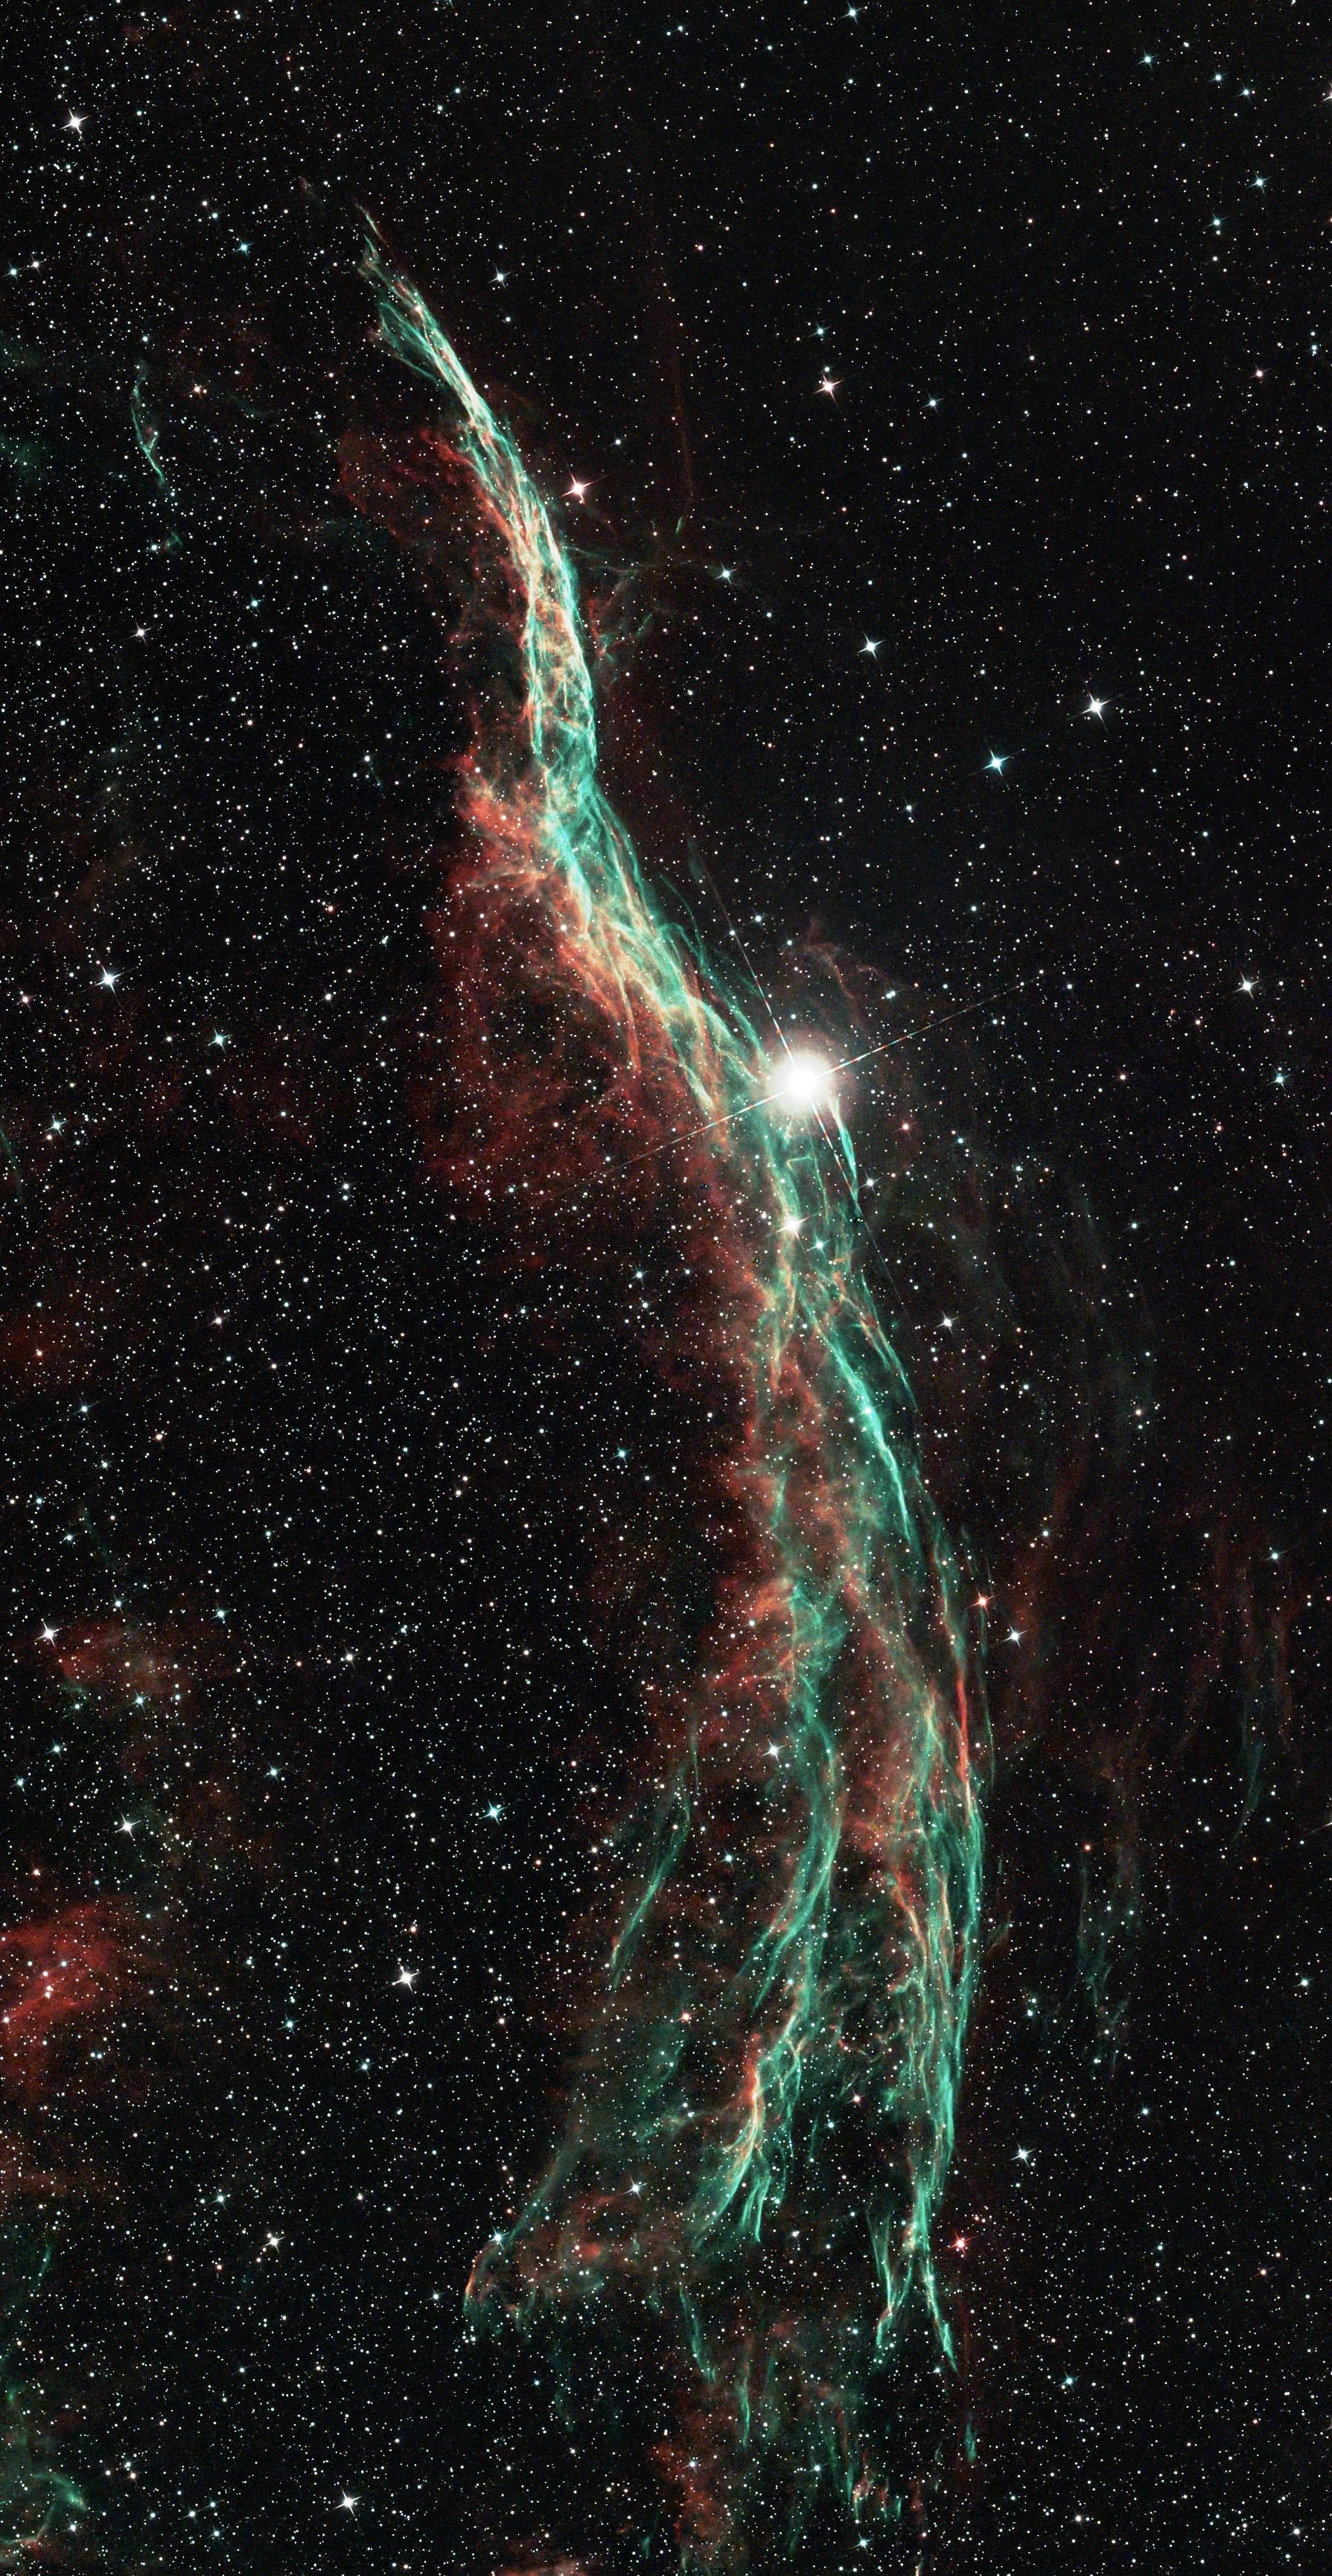
Western Veil Nebula
Pickering’s Triangle
Between the two Veil Nebulae lies an interesting structure known as Pickering’s Triangle. This tangled network of branching filaments extends through the central region of the Cygnus Loop. This fascinating region is not only beautiful to image, but holds an interesting place in astronomical history.
Discovered in 1904 at the Harvard College Observatory, the Triangle is named for Edward Charles Pickering, head of the observatory, which was the custom at the time. However credit for the discovery is given to Willamina Fleming, who identified the nebula while examining photographic plates. Fleming was one of those “hidden figures” of science whose work at Harvard helped transform our understanding of the stars.
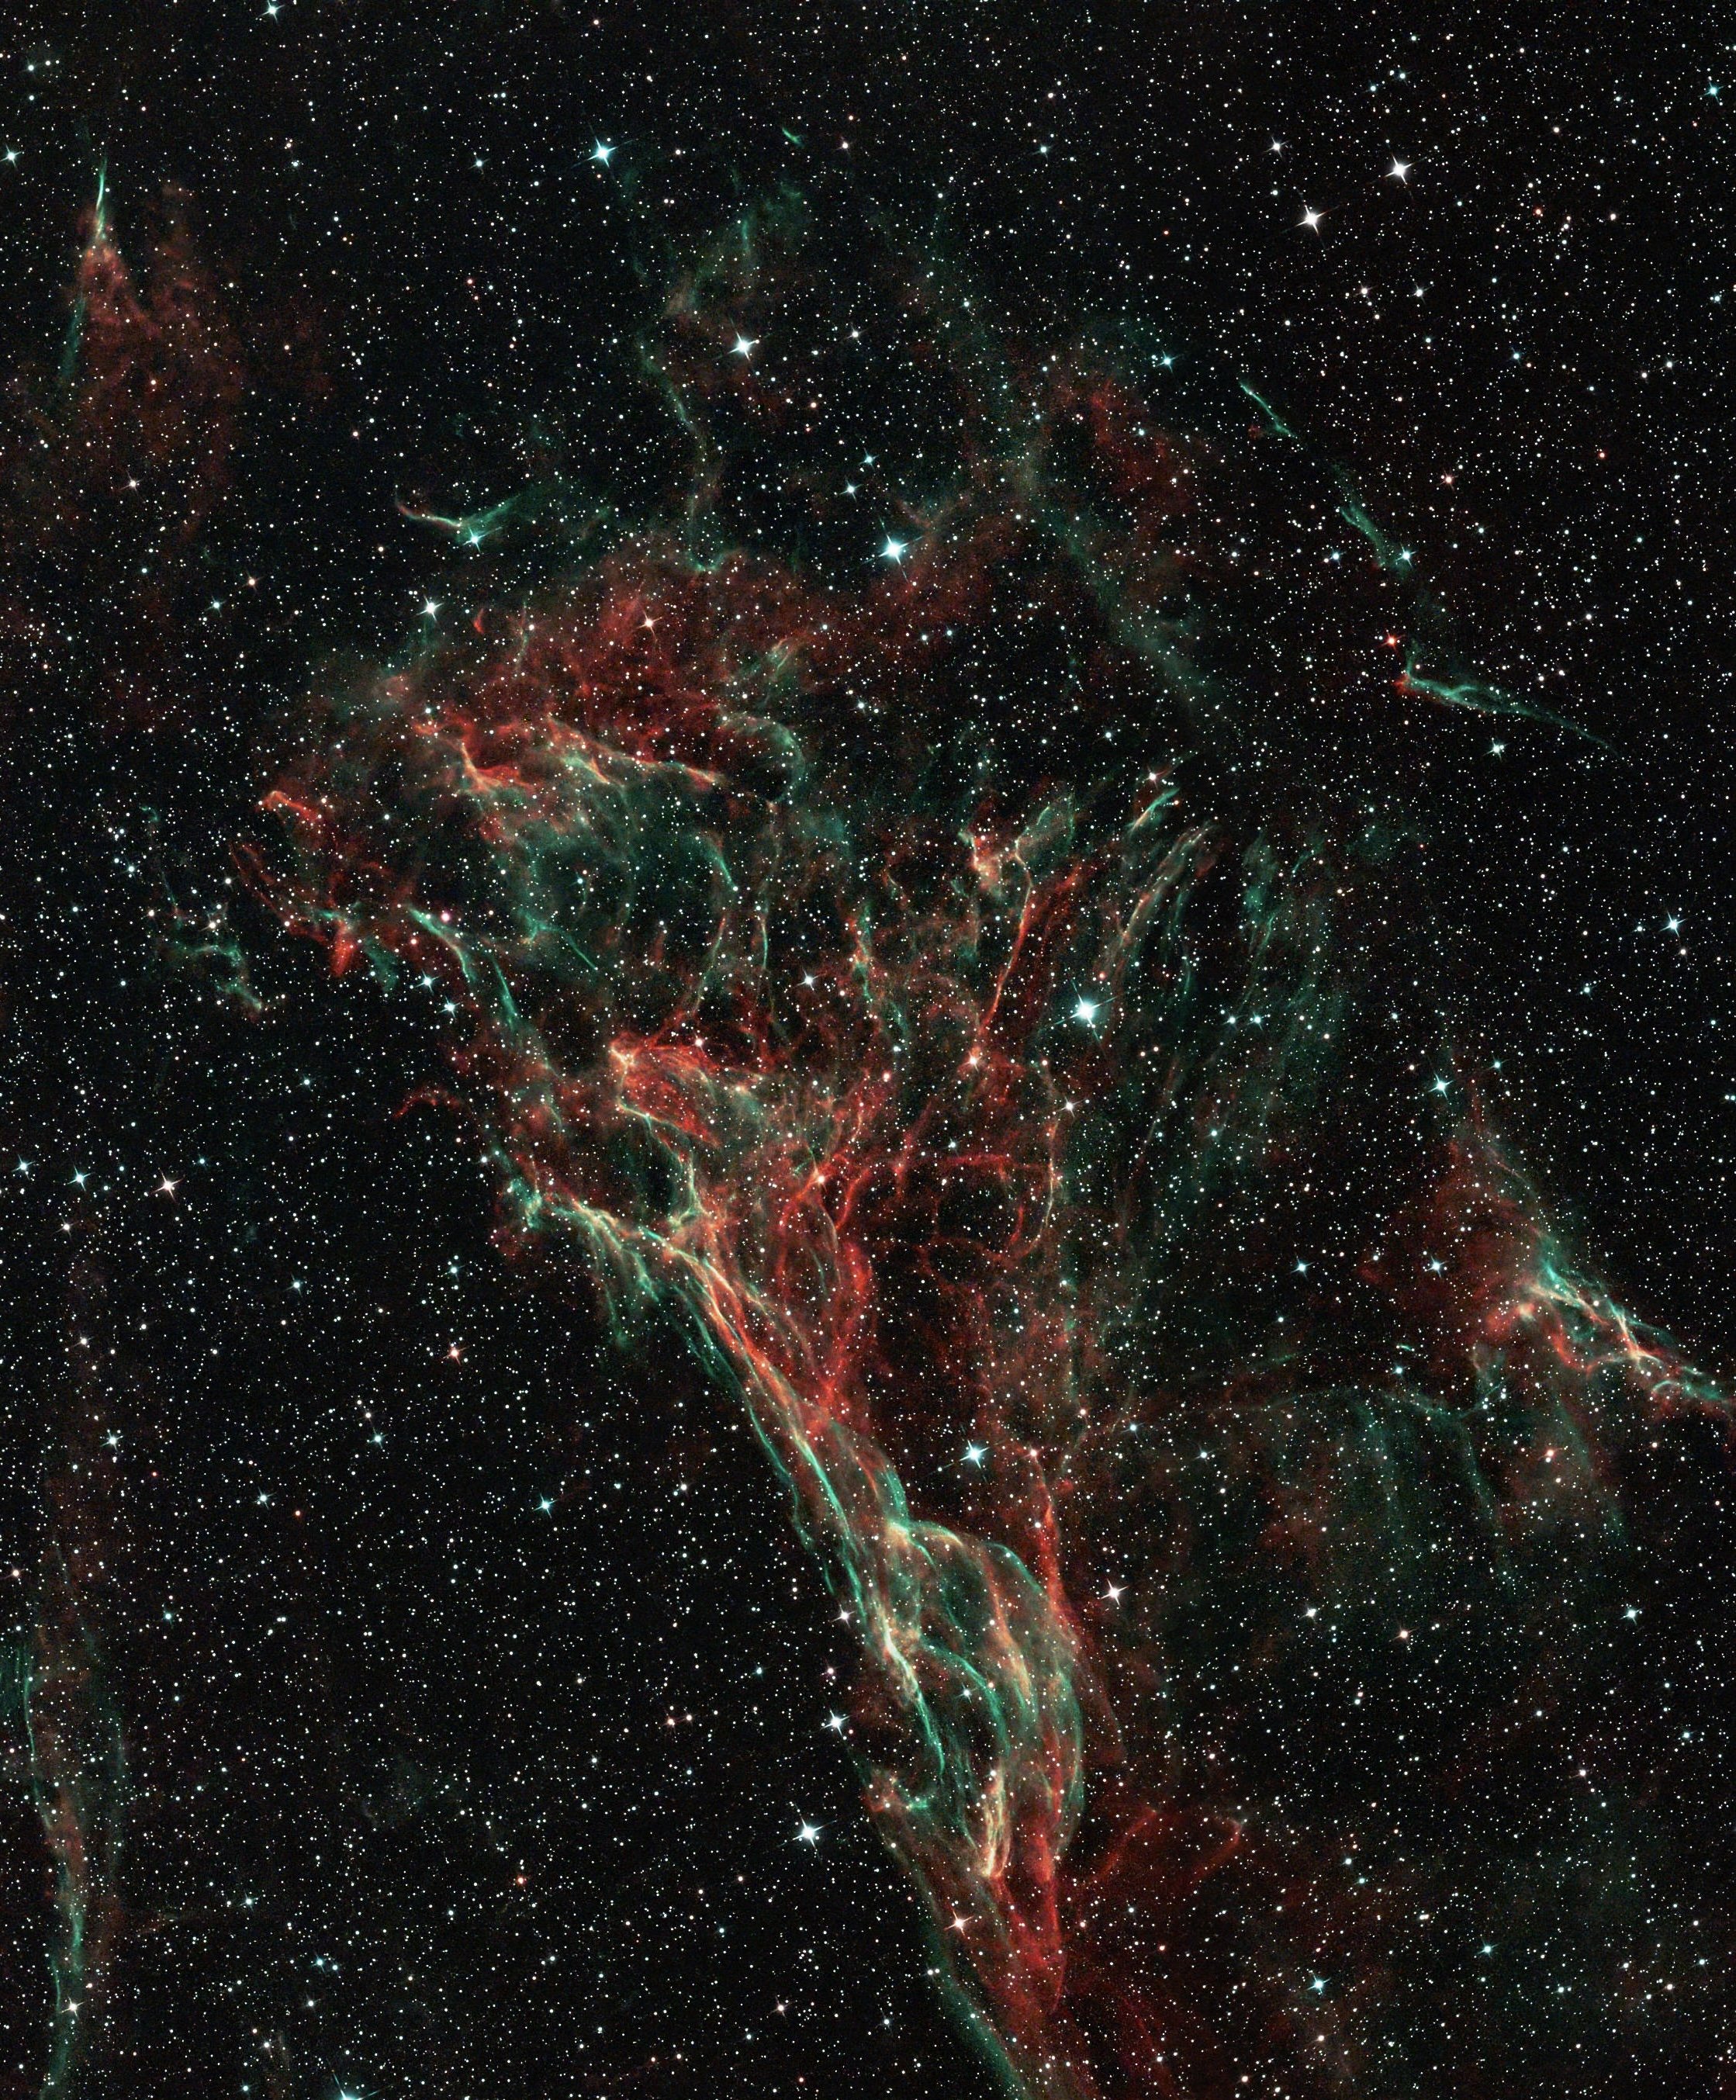
Pickering’s Triangle
Bringing It All Together
Are you still here? Great! Thanks for sticking with me! As an educator, I tend to ramble sometimes….
Each of the three sections of the Cygnus Loop are amazing targets in their own rights, and you can spend a lot of time as an astrophotographer imaging portions of each one and making discoveries of so many little structures. But these are not unrelated and are part of a much larger structure.
My goal in tackling this was to get a large image of the entire Loop, and to practice setting a mosaic plan in the ASIAir Plus, and processing this image. This was going to take a little more work than simply pointing my telescope at Cygnus and pressing a button!
The Plan
Once I had settled on the Cygnus Loop as my next project I checked Stellarium to get an idea of when it would be visible from my backyard. I have a lot of trees to the east, so I had to wait until about an hour after dark before I could start anything.
Using the ASIAir Plus “Plan” feature, I started looking at how this would work. This feature is really useful, as it already knows the field of view of your camera, and you can see exactly how much of the sky your camera will see. As I mentioned earlier, the diameter of this region is about 6 full Moons, and my ASI533MC camera cover slightly more than one full moon in width. This meant I needed to go with a mosaic.
With a mosaic, you have to make sure you have enough regions covered with a slight overlap. That way when you take the images into your processing software you can stitch them together so that the final image looks like one picture. For this field of view I needed nine (9) regions! I had not done anything this large before, and was quite nervous. I was using 300-second (5-minute) exposures, which meant that one exposure per region would be about 45 minutes plus time for moving the telescope and refocusing. As you need more than just one sub to get a decent image, this was going to take some math on my part, as well as at least three nights due to the short amount of time the Cygnus Loop was in view. I settled on 10 subs for each region.
Equipment
For this project I used my new rig. This consists of my Apertura Carbonstar 150 loaded on my Skywatcher HEQ5Pro. I recently upgraded my mount with the Rowan belt conversion which replaces the metal gearing with a belt. This basically removes backlash which helps the mount track smoother, and makes the mount much more quiet.
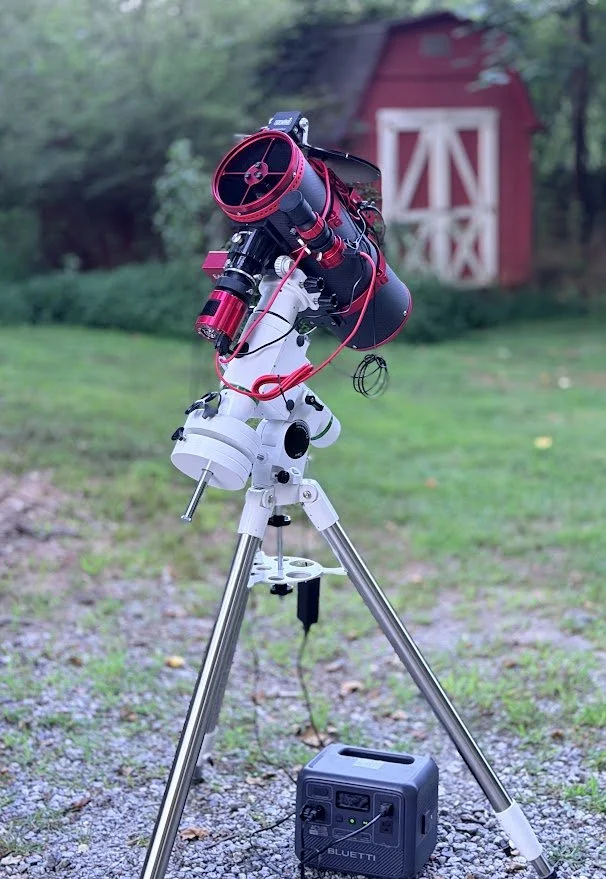
My setup
Attached to the telescope is my ASIAir Plus computer which I control using the ASIAir app on my iPad. This has been a HUGE improvement for me as I can now control my telescope from the comfort of my living room! There is also my ASI622 camera and guide scope that I use for guiding as well as the ASI533MC cooled camera set to -10 degrees C. In front of the camera I have a SVBony filter drawer which includes my Optolong L-eNhance dual-band filter, and that is then connected to the 0.95X coma corrector.
All of this is being powered by my Bluetti power box. Where I am setting up my telescope is a LONG way to run an extension cord, and this battery has both AC and DC connections so I can run both the ASIAir and the mount all night long. I just have to remember to bring in the battery in the mornings and recharge it.
Acquisition & Challenges
The first night I got the rig up and running, and when I went to bed it was chugging right along. In the app I can look at each individual picture as it is taken, and I was quite pleased with what I was seeing. So off to bed I went!
The next morning I noticed that the plan I had put in place had failed to finish. I discovered that I had put way too many subs in for each region, which made the Cygnus Loop drop behind my house! I then looked at the last few frames that were taken and there were streaks everywhere! All of the images for the last region were ruined! As I went out to cover the telescope for the day, I bumped into the guide scope. It moved! I had failed to tighten down the clamp holding it in place, so when the telescope performed a meridian flip it caused the guide scope to slip in it’s mounting, and the telescope could not tell where it was pointed.
The next evening I ran the plan again, this time with a tightened guide scope. I really enjoy using the ASIAir Plus because it allows me the ability to go to bed and get some sleep without worrying about the telescope. I did wake up in the middle of the night and checked the iPad after the meridian flip to see if everything was still clear (it was!). This set of pictures came out very good, and I decided to run it again the following night so I could get more data. That third night went smoothly!
Processing
When I attended the American Astronomical Society meeting in January of 2026 I had received a couple of 32 GB thumb drives from ZWO. These were free giveaways at their booth and are the perfect size for connecting to the ASIAir Plus and retrieving the images.
When I first set about processing images I save them to a folder on the desktop of my computer. Once I have finished all that I want to do with them, I move this folder to a separate 4TB hard drive for storage. FITS files are rather large and the processing creates several copies as it works, and I like to save all the frames in case I ever need to re-do anything. I can also add more data to them at a later session and not take up space on the computer itself.
For preprocessing I use free software Siril. Siril is an open-source software designed specifically for astrophotography. It receives constant support from the community of users and there are a multitude of videos on YouTube to help you learn how to use it. In Siril you can load scripts that have been developed by various users. For this mosaic of 9 panels I use the script Nazstronomy_OSC_PP. This was developed by astrophotographer Nazmus Nasir (check out his awesome website at https://www.naztronomy.com/about). In this script I set up each panel of the image as a separate session, add my flats & biases ( I find with the ASI533MC Pro camera I don’t need darks as often), and let Siril do its magic!
Once the script is finished, I ended up with a linear image, waiting to be processed. The first thing I do is run an auto-stretch on it so I can see if the image came out decent. At this stage I am looking for obvious artifacts such as dust of lines where the images have been stitched together by the software. Then I select the section of the image I want to keep, cutting off the edges where there are uneven overlapping lines and sometimes stretched star artifacts. This gives me a good wide image to work with.
Next I run the image through a plate solver. This allows the software to compare the image with known star charts (mostly from the GAIA database) so that it knows where in space this image is from. Then I run a spectrophotometric color correction process that balances out the colors of the image based on the true, measured spectral distribution for the stars in the image. This takes out any guesswork on the image and uses astronomical data to give you a baseline to work with.
Once I have this completed I run a background extraction and noise reduction, which helps eliminate the “noise” inherent with low-light imagery. The reason you do multiple exposures of an object is to reduce your signal to noise ratio (SNR) to give you a cleaner image. Using the background noise reduction helps to give you one final sweep of the noise. I use another script to help with this, RCAstro’s NoiseXterminator. The RCAstro suite of tools were once exclusively for Pixinsight, another processing program, but have recently been made available for Siril users.
At this point, when I feel like the image is as clean as I can get it, I then run the RCAstro BlurXterminator. This piece of kit does a fantastic job of helping with your stars to keep them from being “blown out” and allows you to reduce the halo effect (or increase it!) that can appear in your images. You can run it multiple times if you wish to get the look you want.
Now that I was happy with the image, I ran one final script, Statistical Stretch, which applies a stretch to the linear image to allow you to finally see the final image. I am not very good with playing with histograms to apply stretches manually, so I have been happy with how this script works for me. As I continue to improve my skills, I will try to learn histograms more, but for now this works!
With this final product saved, I then can close Siril and open another free software, GIMP. GIMP is an open-source photo processing software that is extremely powerful! I know that I am not using this software near its potential, but I’m learning as I go. This is where I start playing with brightness, contrast, hue, saturation, etc. I also am able to take my photo signature .png watermark and overlay it onto the final image for publication. This process takes some time, and I recommend saving a copy of your original so you can always start over if you want!
Final Image
And here it is, my final image. You can also view the HD version on Astrobin.
Conclusion
Finally! You’ve reached the end! Thank you for sticking with me!
I truly enjoyed working on this image. I love the amount of detail that is present in this image, even from as rough skies as I have in metro Atlanta. I am impressed by how much more data is in this image as you zoom in. I have been sharing this image with my astronomy classes as we begin to study stellar composition. Being able to show students the colors of each of the stars and then having them guess the temperature based on that color, and then looking up the star in SIMBAD to get all of the information about it is invaluable!
As the world continues in its orbit around the sun, we are reaching the time of year where the swan is beginning to disappear in the daylight. I am very thankful for the time I had exploring its mysteries this summer, and look forward to seeing it again in 2027 as it soars back into my nightly view.
Now to focus on the hunter and his treasures of winter….