Seeing the invisible
Radio. Microwave. Infrared. Visible. Ultraviolet. X-ray. Gamma ray.
The universe is filled with light.
The problem is, we can’t see most of it.
The electromagnetic spectrum stretches across an enormous range of wavelengths, yet the human eye is sensitive to only a tiny sliver—from roughly 380 nanometers, which we perceive as violet, to about 700 nanometers, which we perceive as red. Everything outside that narrow window is completely invisible to us.
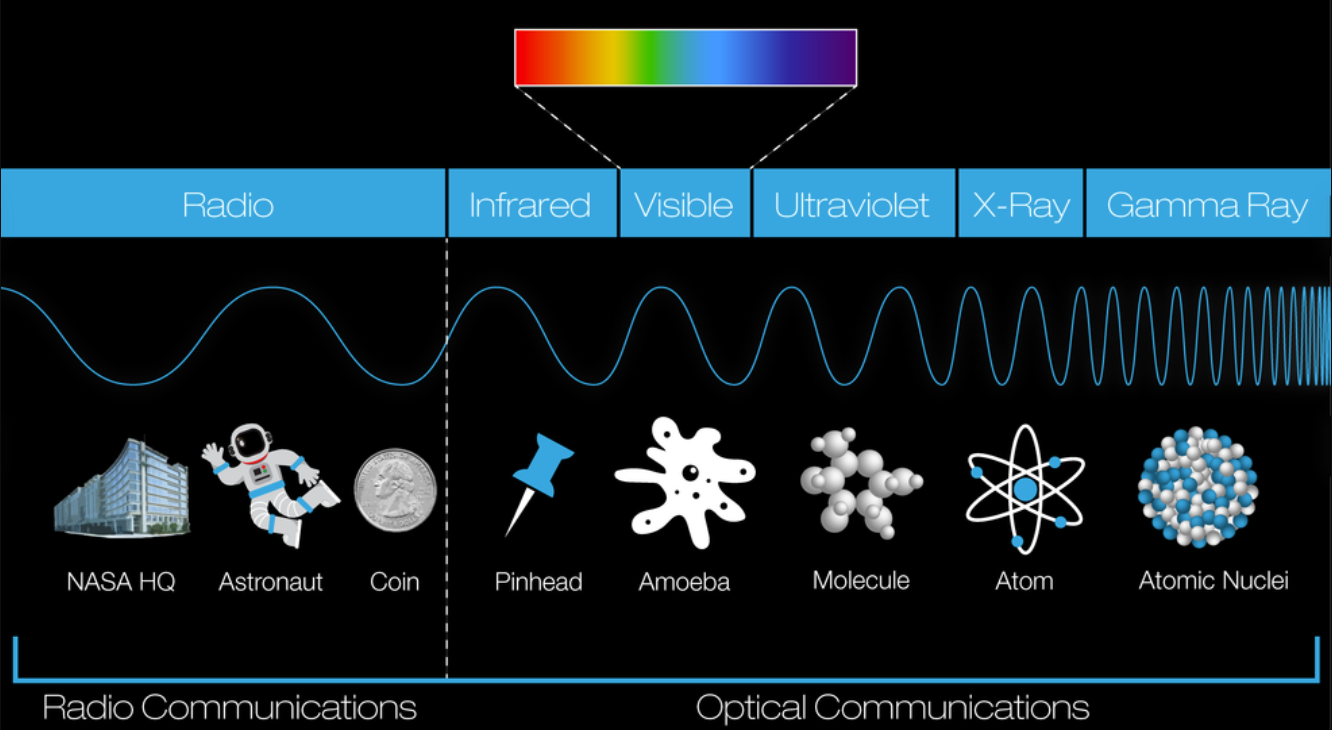
Image: NASA
Think about what that means the next time you look up at the night sky. As spectacular as the stars, planets, nebulae, and galaxies may appear, your eyes are revealing only a fraction (0.0035%) of what is actually there. The universe is broadcasting information across the electromagnetic spectrum, but without the right instruments, most of that information passes by completely unnoticed.
Fortunately, we have learned how to build instruments that allow us to detect what our eyes cannot. And sometimes, those instruments look very different from the telescopes we normally associate with astronomy.
At the Green Bank Observatory in West Virginia, I recently had the opportunity to use one of them: a 40-foot radio telescope.
For the first time, I wasn’t simply looking deeper into the universe.
I was seeing the invisible.
History
The 40-foot telescope at Green Bank has quite a history of its own. It arrived at the observatory in 1961 and began observing that December. Unlike the huge, fully steerable radio telescopes we often picture, the 40-foot is a relatively simple transit telescope—it moves north and south while the rotation of the Earth carries objects through its field of view. But don’t let that simplicity fool you. In 1962, it became the world’s first fully automated telescope and began a five-year program monitoring some of the brightest radio sources in the sky, including the Crab Nebula, Cygnus A, Virgo A, and Cassiopeia A. That kind of long-term observing turned out to be scientifically valuable. Measurements made with the 40-foot helped astronomers study how the radio brightness of Cassiopeia A—a supernova remnant roughly 11,000 light-years away—has changed over time, eventually contributing to improved models of several important radio calibration sources. After sitting mostly idle for nearly two decades, the telescope was brought back to life in 1987 as an educational instrument and has been used by generations of students and teachers ever since. And there is one more wonderful connection to radio astronomy history: its feed system incorporates equipment originally built by Frank Drake for Project Ozma, the world's first scientific search for extraterrestrial intelligence. Using the 40-foot, then, isn't just an opportunity to learn radio astronomy; it's a chance to work with a telescope that has been part of the story of the field for more than six decades.
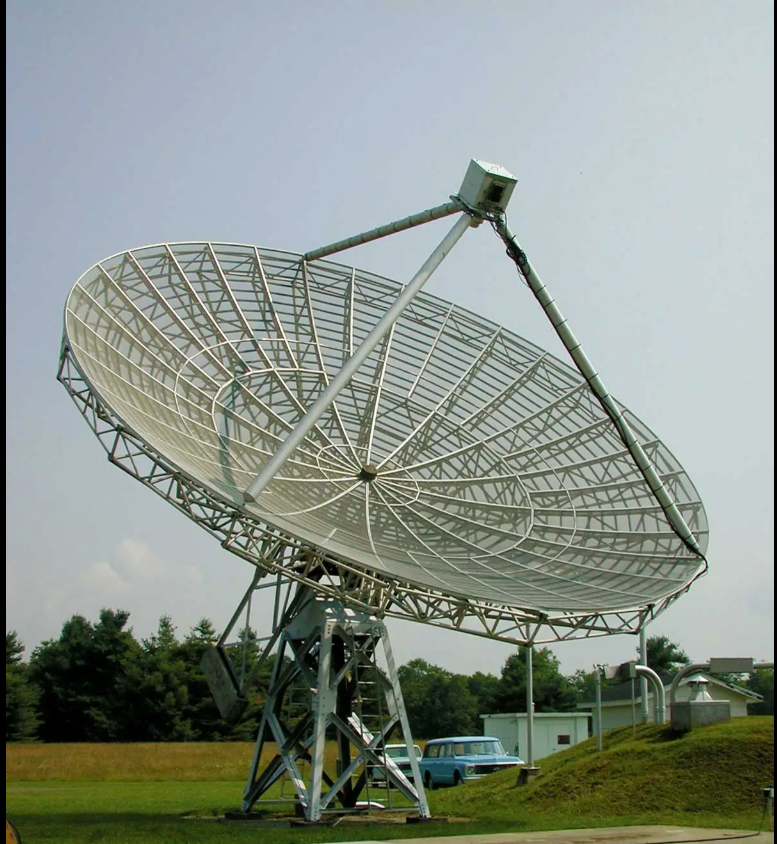
40-foot Telescope Photo: Green Bank Observatory
Radio Astronomer For A Day
While participating in the Green Bank Star Quest this past July I had the opportunity to sign up for training on using the 40-foot telescope. I have known about this telescope and its use as an educational tool for several years. I have been wanting to bring my astronomy classes up from Atlanta to participate in their Radio Astronomer For A Day program. The program is extremely affordable for my classes, however the travel from Atlanta is the biggest cost-hurdle that I have yet to overcome. If you have any ideas for how we can get a coach bus paid for, let me know!
On the bus ride out to the site we were given a brief history of the telescope and were told about what to expect.
The control room is in an underground bunker, which serves as a natural Faraday cage for blocking the electromagnetic “noise” of the computer from being detected by the telescope. There is also a bathroom located in an external building that you have to use a key for. The key is located in the bunker (this was starting to sound like a video game adventure!).
After descending a short set of stairs we entered the control room which was air-conditioned (praise be!), a nice reprieve from the July humidity. The walls of the control room was covered with drawings from former educational groups and schools that had visited the facility. There was a rack of equipment that appeared to be the original controls from 1962, a computer which displayed the current Local Sidereal Time (LST) and had a metronome sound that we would be using later.
We were directed to rows of folding chairs that were setup and given a copy of the Observer’s Manual. In this manual we found step-by-step directions for taking both continuum scans and spectral scans.
Our instructor did a good job of explaining what we were doing and how to record the data, and even made sure that each person had an opportunity to practice. Once everyone had practiced, we loaded back up in the bus and returned to the visitor’s center where we could sign up to come out another night between 11:00pm and 3:00am to take readings on whatever we wanted to.
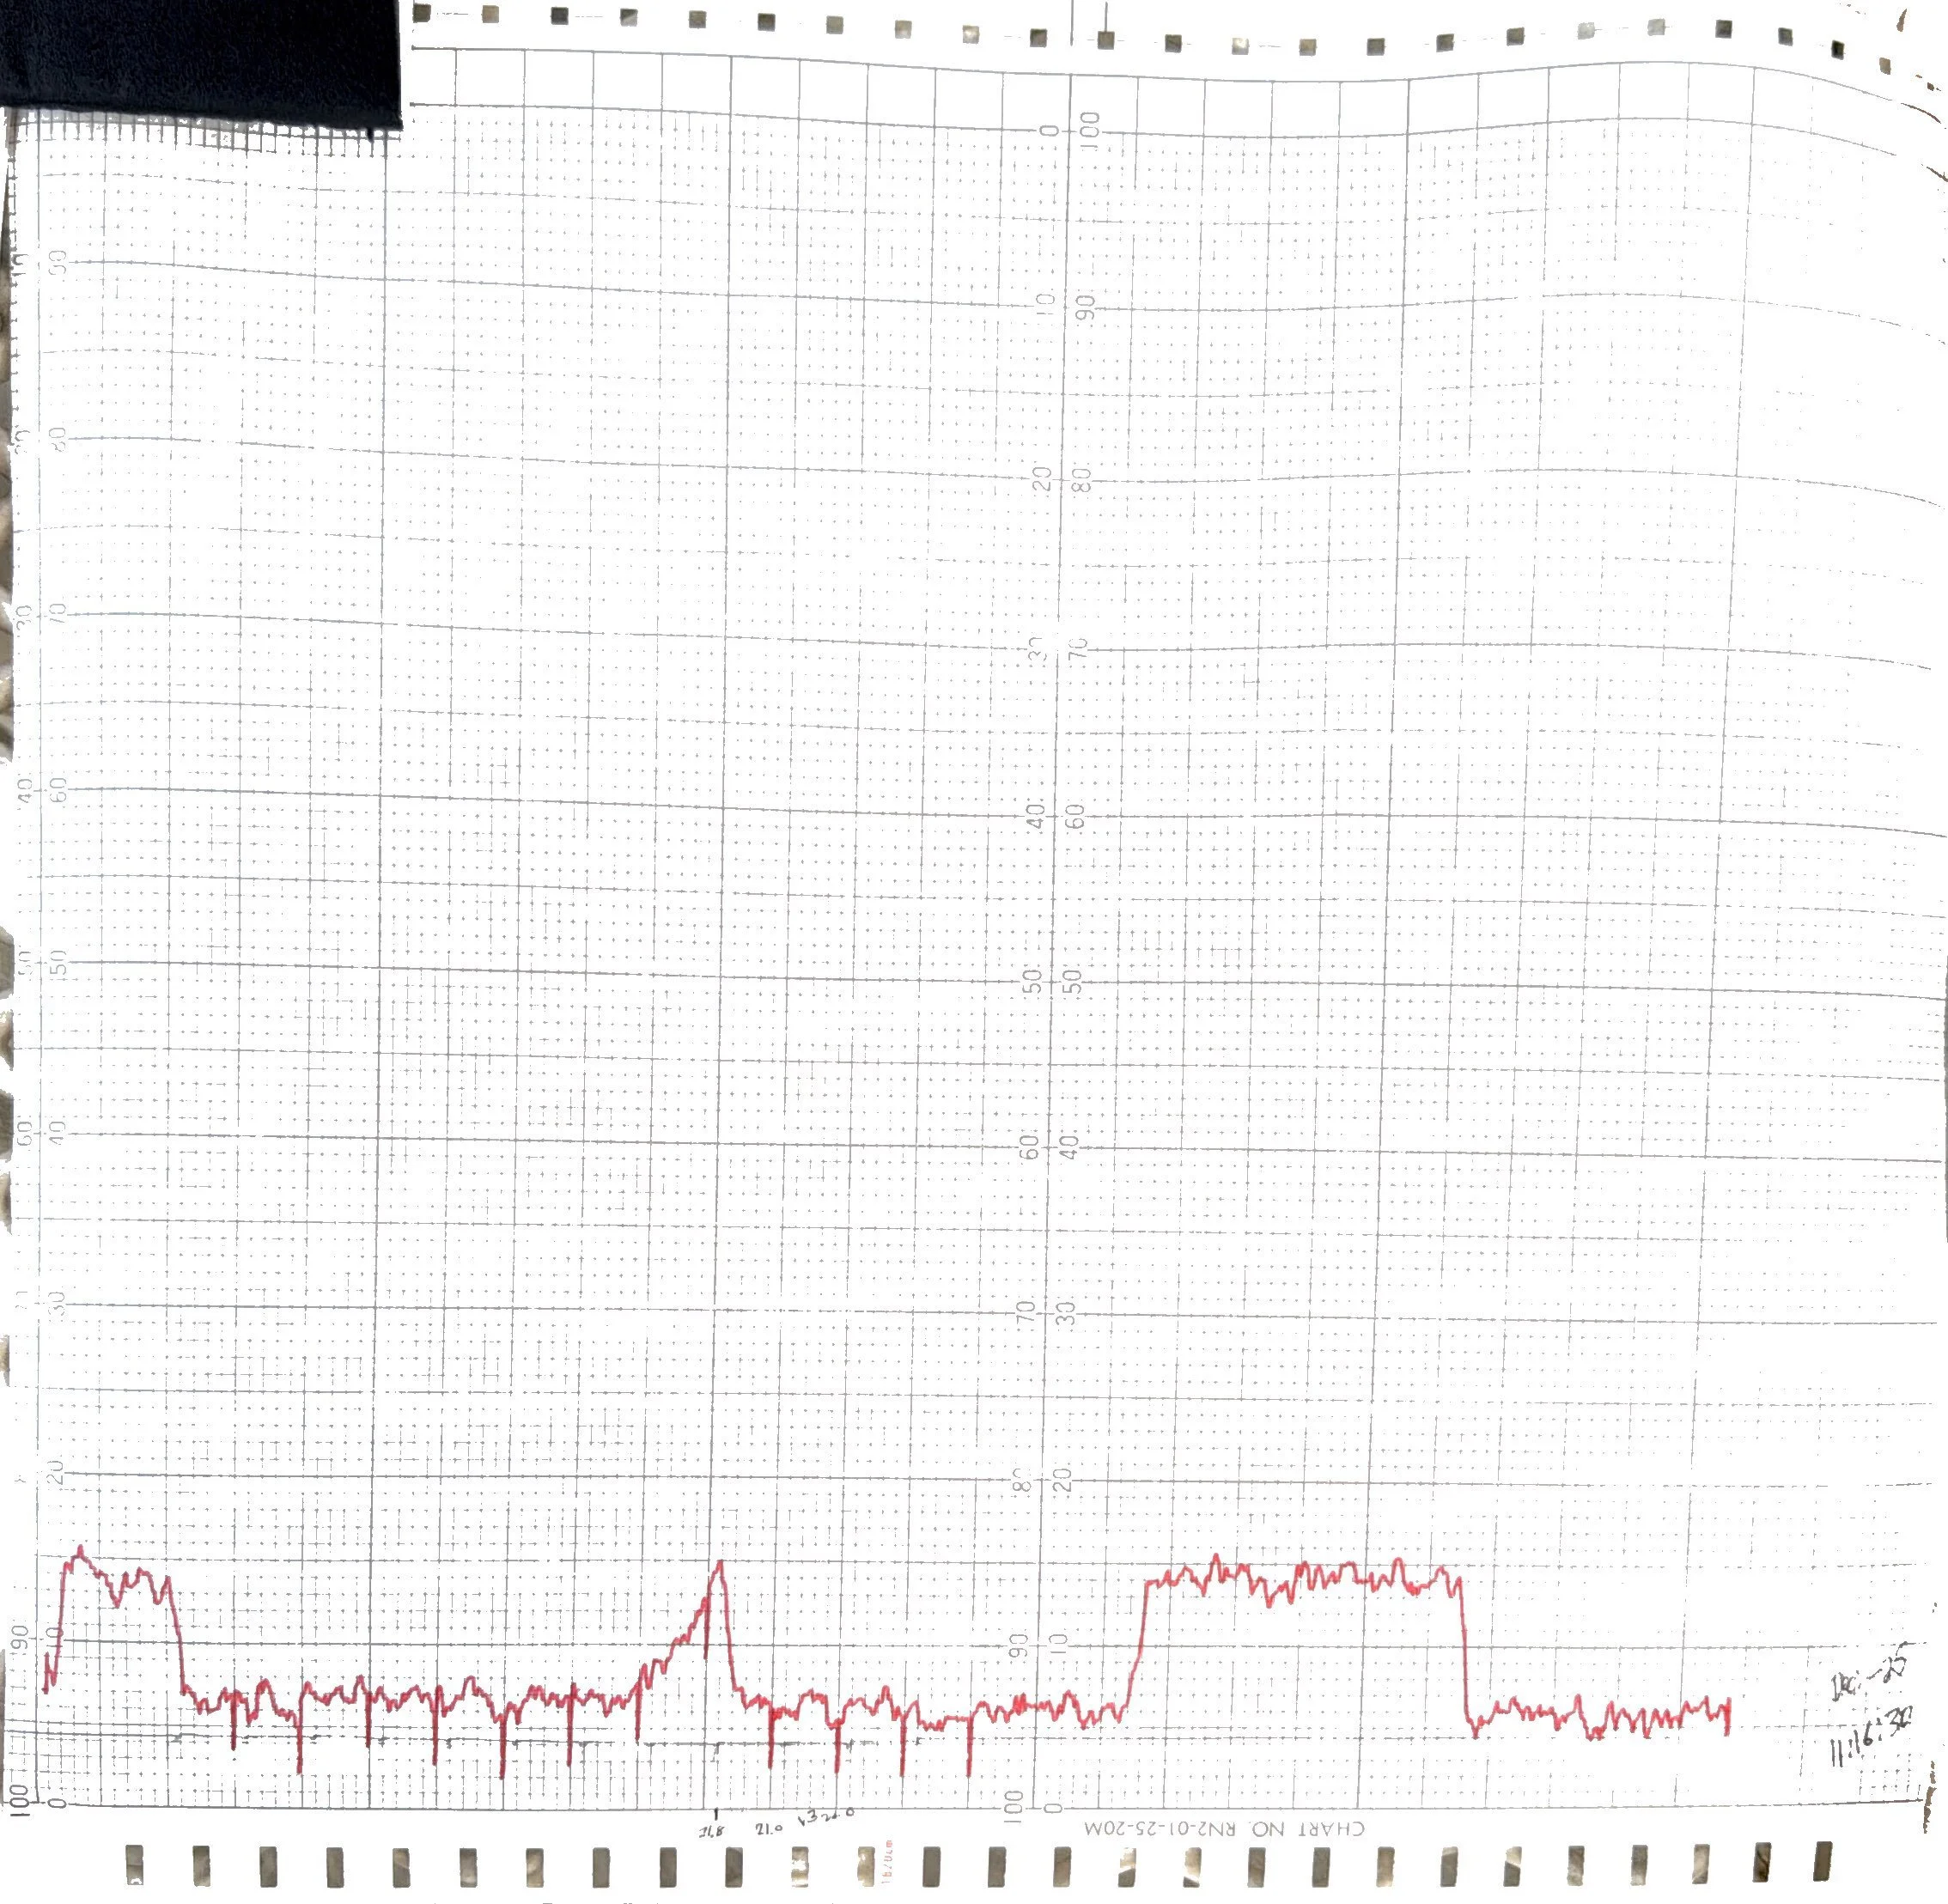
My first reading!
The chart reads right to left. The tall plateau is a calibration setting. The peak is the detection, with each mark representing 0.1 MHz.
I signed up for the Friday night slot, and since I had already packed up my gear due to the cloud cover that evening, I walked out to the telescope. It was an eerie feeling walking alone in the dark with just a headlamp. The ground was covered with fog, there was a small humming coming from the other telescopes as I walked past, and there were eyes! The fields surrounding the observatory are full of white-tailed deer that are protected in this area and every time they would look at me their eyes would flash in my headlamp beam, giving me the feeling of being watched!
At the bunker control room there were about 5 other people there, and NO STAFF! We were on our own to work the telescope! I have to admit that it was a little panic-inducing at first, realizing that we were alone with no “adults” in charge!
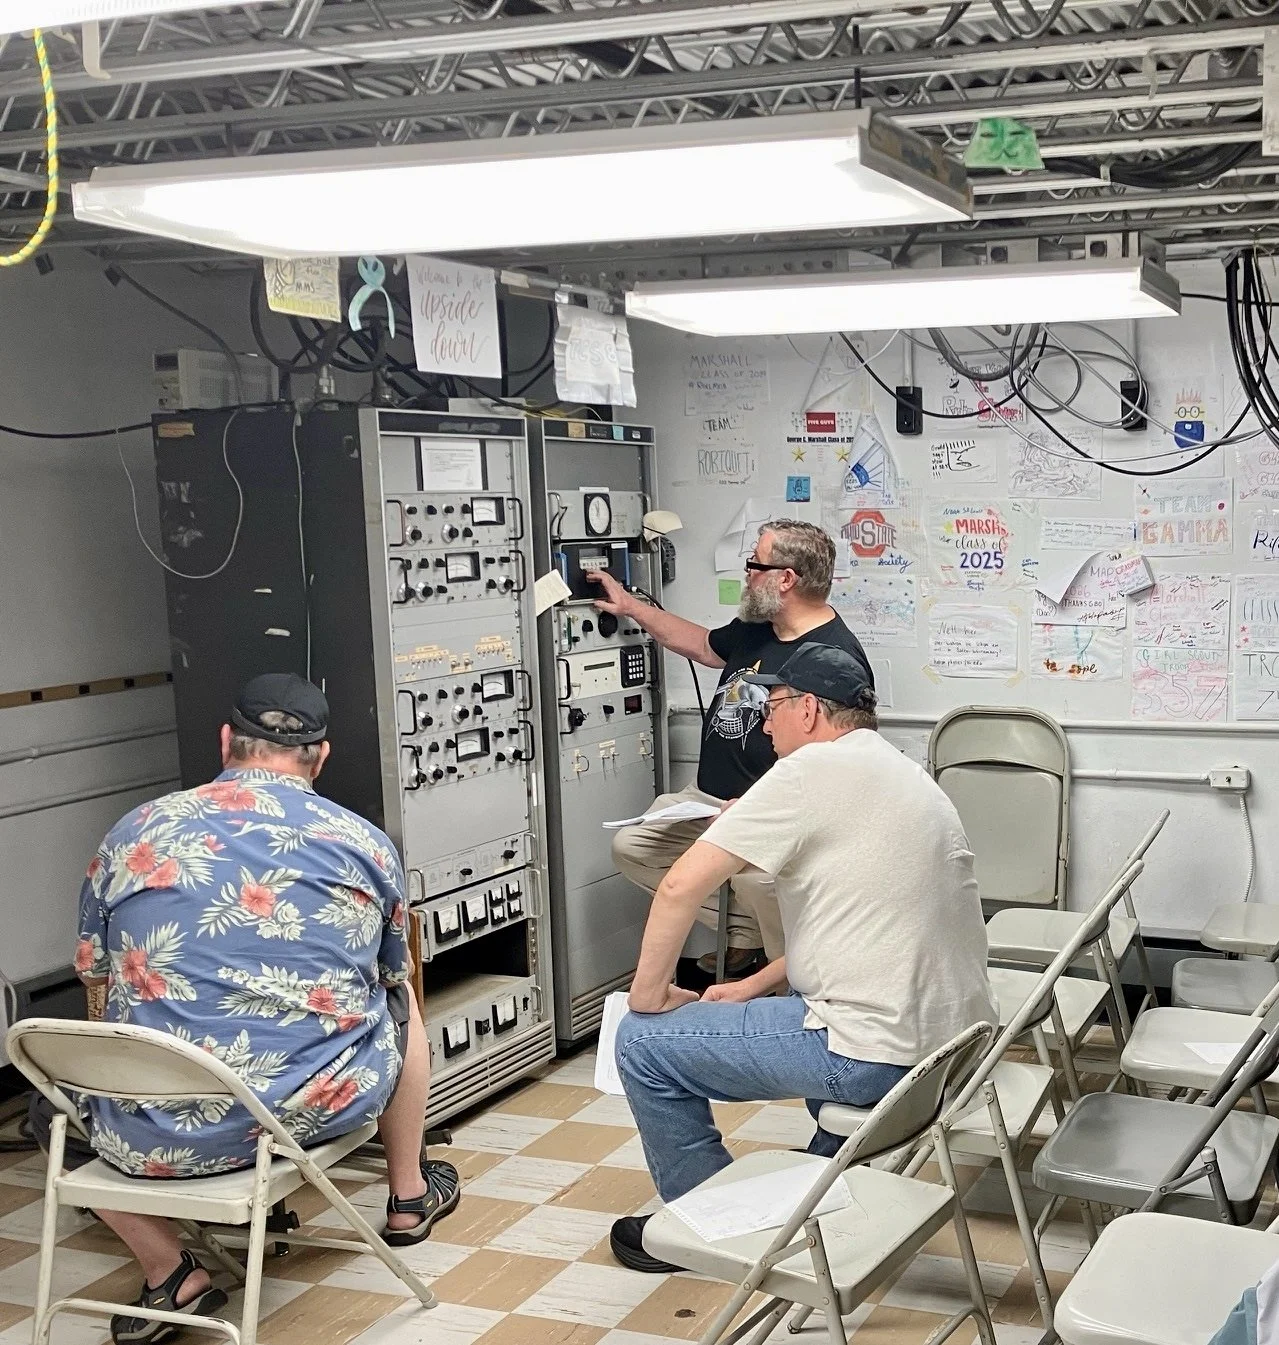
Inside the bunkhouse. While one person increases the frequency by 0.01 MHz every second, another person at the printer presses a “MARK” button every 10 seconds.
Thankfully a few of the people with me were astrophysics professors at various universities around the country, and were able to help the rest of us figure out what we were doing!
After a couple of start and stop issues as I learned the equipment, I was able to get a spectral reading of hydrogen moving through the galaxy! Since we know at what frequency hydrogen emits at, we can tell whether the detected signal is moving towards us or away from us due to the Doppler Effect.
I pointed the telescope at a source above the galactic plane, and detected two different sources at different frequencies. Without doing any deep mathematics of the findings, the general consensus was that it may be showing two arms of the galaxy. To me, it didn’t matter, as I actually had detected SOMETHING!
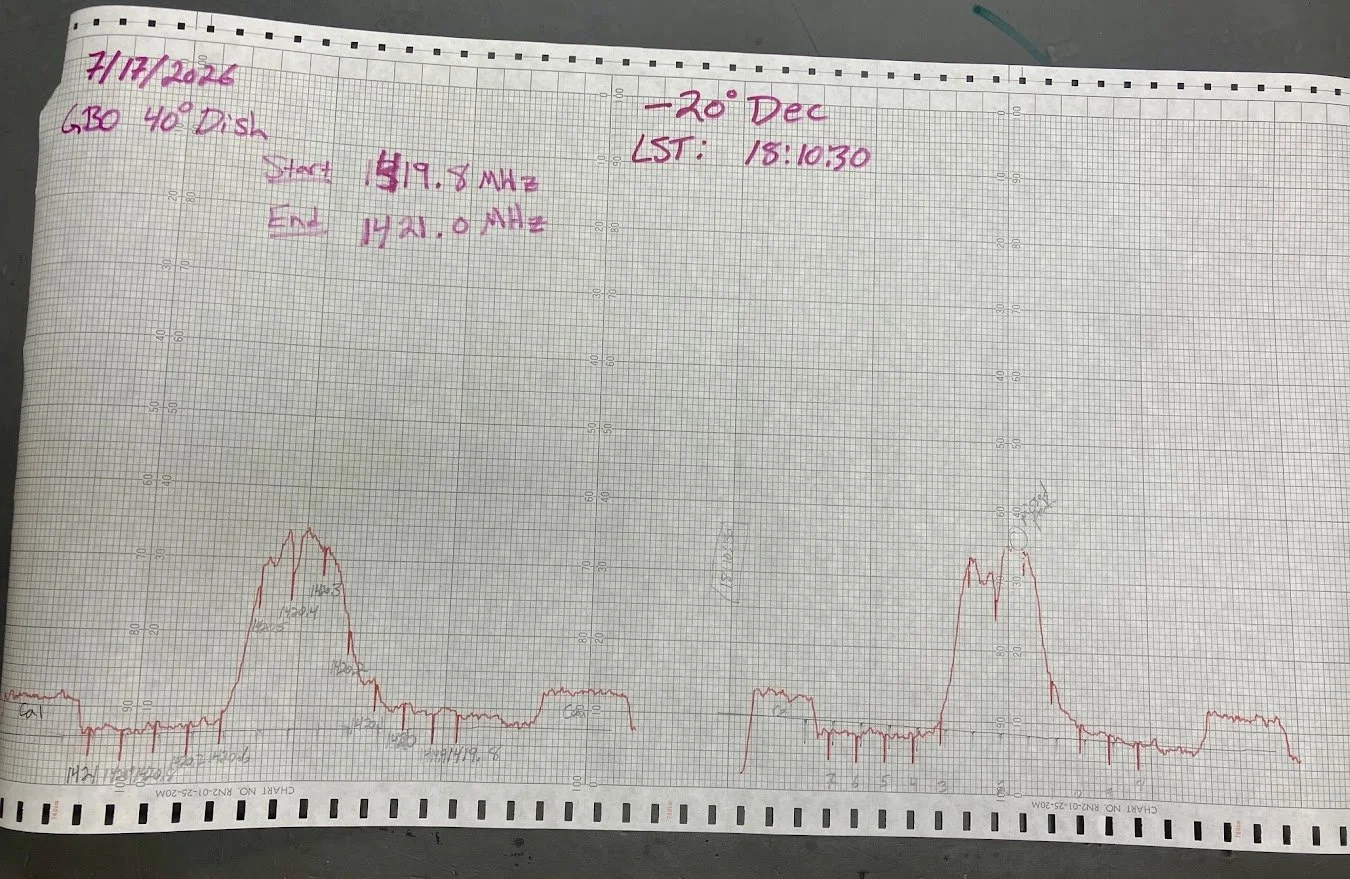
The readings I took.
The one on the right was done first, but the printer is old and missed the top of the first peak. We had about 5 minutes pass before running the second readout, so in that time we think the rotation of the Earth moved us back closer to the galactic plane, which accounts for the smaller peaks.
To be honest, I don’t know a lot about radio astronomy. I have a general level understanding of what it is, but I have never spent any time learning about it. Now that I have had experience gathering data, I have the itch to start looking deeper into the subject, and how I can introduce it to my students. I have found a project proposed by researchers at the University of Hong Kong where the combination of an old wok and some minor electronics can be used by students to detect hydrogen bands in the galaxy, even in “noisy” cities!
Have you, dear reader, ever dabbled in radio astronomy? Do you have any tips on how to get involved as a complete amateur? Please leave me a comment and help me out!